Sooooo, you know how some things work out better in your head than they do in real life? Well, let me just start by saying: this was one of those things. I can say that, yes, I have successfully re-purposed my towels. But, I’ll leave it to you to decide where my project falls on the scale of mopheads to terry shorts.
The backstory: When I started this “what to make out of my towels?” quest, I kind of had in the back of my mind that what I really needed was a cover-up to wear out of the shower at our summer place. I absolutely adore the outdoor shower at our cottage.  There’s something about the fresh air, the sunshine and the smell of shampoo that does it for me. What doesn’t do it for me is struggling to keep myself covered in all the right places when it’s time to head back inside. Nine times out of ten I am showering off with a child (or two) in tow and somebody wants to be carried or is grabbing at my swath of terry. And while I am perfectly content to let them run nudie into the house, I am not interested. Nor are our neighbors.
So, I needed a cover-up. The delusions of grandeur that I often suffer when being creative in my head lead me past the elastic-added-to-hold-it-up variety of terry cover-ups toward something a little more … substantial. Something I could actually wear for a few minutes – long enough to hang up a couple of suits, wrangle one child out of his suit or the other into his clothes, whatever. But, to be honest, I am only a fair to middlin’ seamstress and what I know about clothing design is limited only to what I think I understand on Project Runway. Really, I had my work cut out for me from the beginning.
So. I used a pattern. For a 1970s tunic.
It looks fab on this tweeny-bopper, doesn’t it? But of course I was making this out of terry, and not full sheets of it either. So first step was to create my fabric using a blue and white striped towel along with my whites. I pieced together my biggest hunks of hole-free towel so that I had two pieces of fabric matched up with the striped section on the bottom. I enjoy an exposed seam, and really, this isn’t couture, so I didn’t finish them in any way. I did take care to reinforce all of my seams to guard against any raveling ruining my “masterpiece” later.
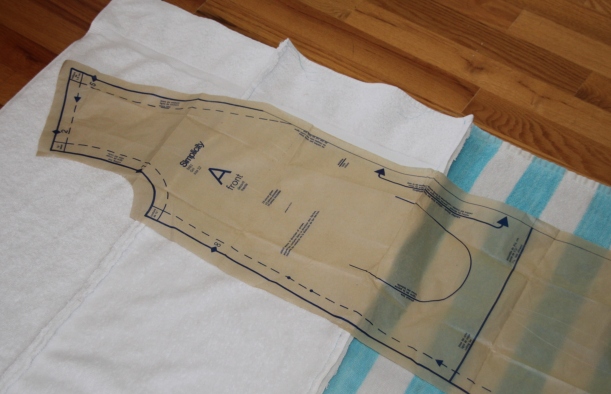
Next, I laid out my pattern and cut. My original vintage pattern was a girl’s size 12 so I had a few modifications to make, but I winged those and then trimmed and tucked a little later. The tunic pattern calls for a seam down the front so I added a bit of width to each side so that I could wrap it closed instead. I don’t have a serger, but I did finish the cut edges of the front and arm holes with an overcast stitch. Then, finishing touch: I cut 4 strips to make tie closures for the front, used the overcast stitch to trim them up and attached in the right places. Aaaaaannnnnnnnd … here she is:
See, isn’t that shower great?
And, aren’t I brave to let you see me wearing this thing? It’s functional alright, and good for a giggle, so I’ll be keeping it. And you know, really, sometimes crafting gives you lemons and sometimes, lemonade. Either way, I have something to mop up all that juice.


I love it …definitely lemonade! Your shower is also great. It reminds me of outdoor showers at the beach when I was a child.
OMG! I had that pattern when I was a teen! Your design is divine and it works! Good for you
This is such a fun post — and project! You rock. And that shower is amazing ; )
oh, I want an outdoor shower like that! Love the towel tunic – that’s just perfect.